|
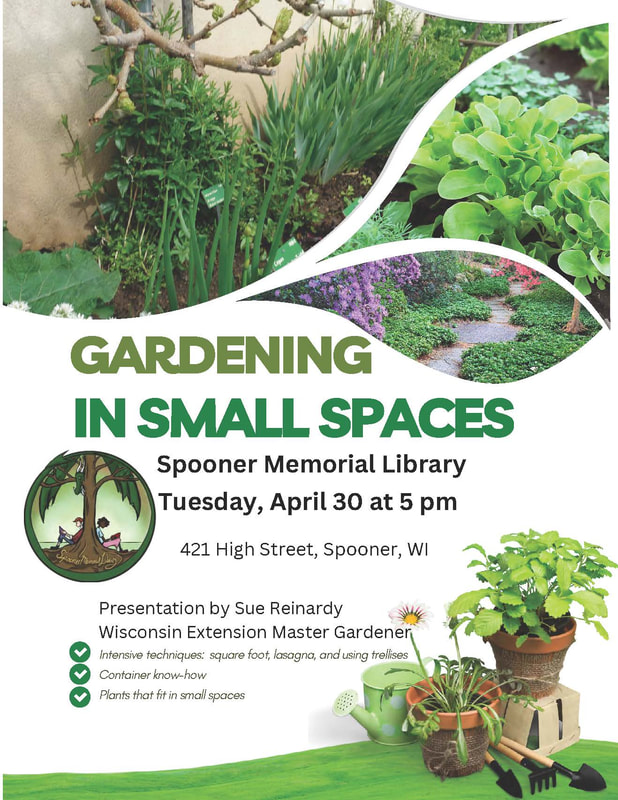
Early spring is the time to check out catalogs, place seed orders and start seeds. Learn about several seed starting techniques, how to decipher catalog and seed package jargon, and proper planting conditions in this program. 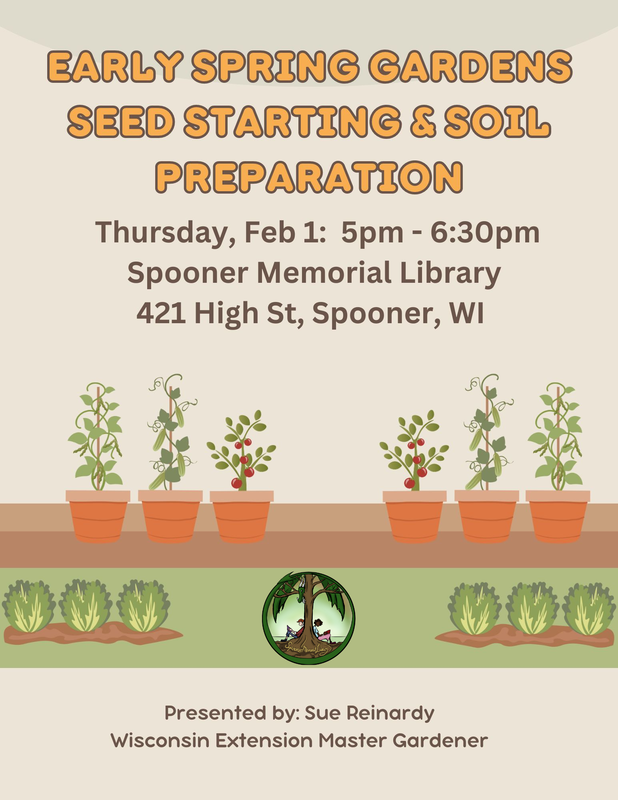 The Spooner Agriculture Research Station Teaching & Display Garden has some great ideas that you can use next year when ordering seeds for your 2024 garden. Several that stood out as especially striking are shown below. 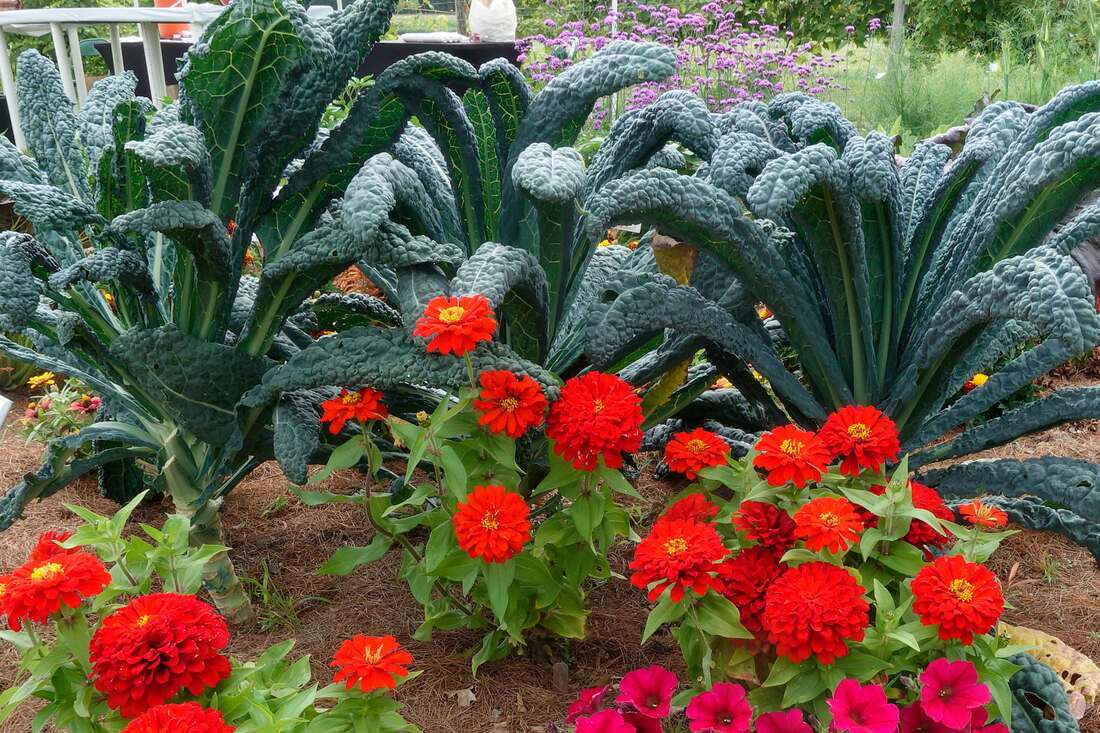 This combo is Black Magic Kale and Holi Scarlet Zinnia. The Zinnia is a 2019 All-America Selections winner. "AAS Judges deemed this an “excellent flower” because of the bright solid color, size, and the number of blooms as well as the disease resistance, which was superior to the comparisons." 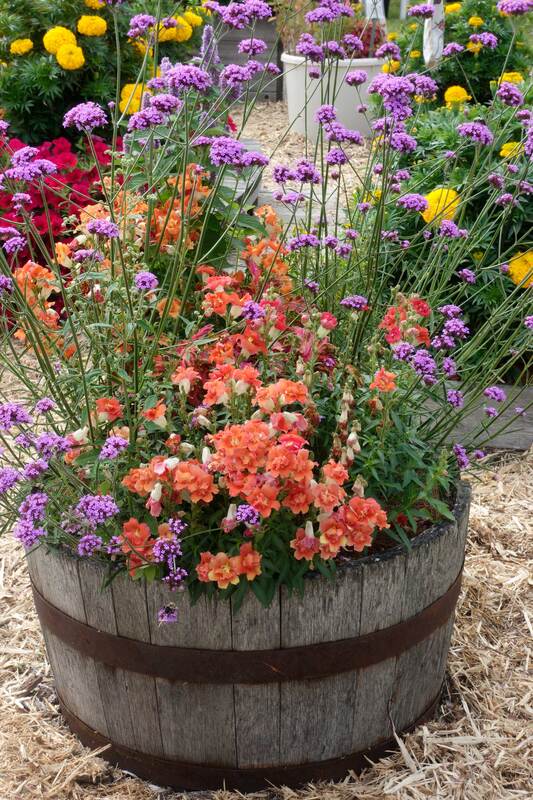 The other combo that received raves from visitors and pollinators included two All-America Selections winners. Snapdragon Double Shot TM Orange Bicolor F1 (Antirrhinum majus nanum) was a winner this year and combined beautifully with the 2022 winner Verbena Vanity (Verbena bonariensis). Bees and butterflies were constantly visiting both of these in August. 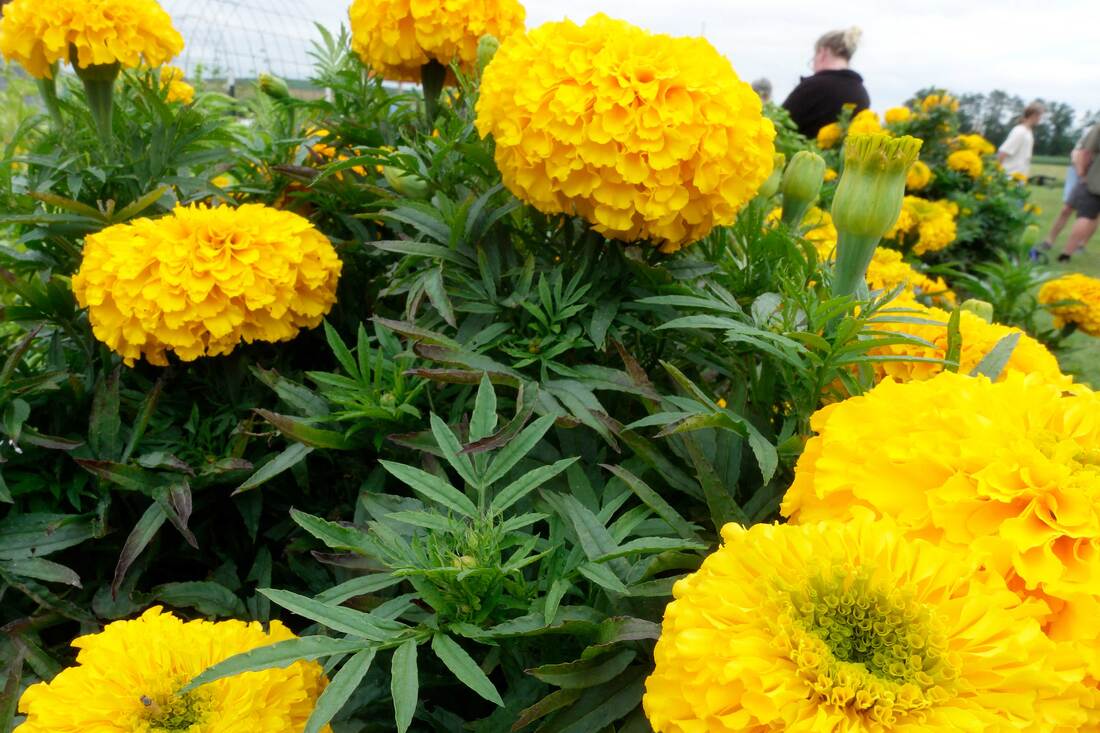 This 2019 All-America Selections winner is Big Duck Gold Marigold. It looks good in both a planting bed as well as in containers. Large blooms and full bushy plants really stand out.
The Teaching & Display Garden is open to the public for self-guided tours during day light hours seven days a week mid-May through mid-September. The Station’s Teaching and Display Garden is located at 780 Orchard Lane off Highway 70 just east of Spooner. Due to construction on Highway 70, Orchard Lane and Hwy 70 is closed at the Yellow River bridge so the only access to the Garden is via Orchard Lane to the north from Ramsdell or Ojibwa Rd.  This is a repost from September 2018. Now that we are past Labor Day, it's time to start thinking about finishing up the garden tasks. Here are a few links with information for the rest of our growing season.
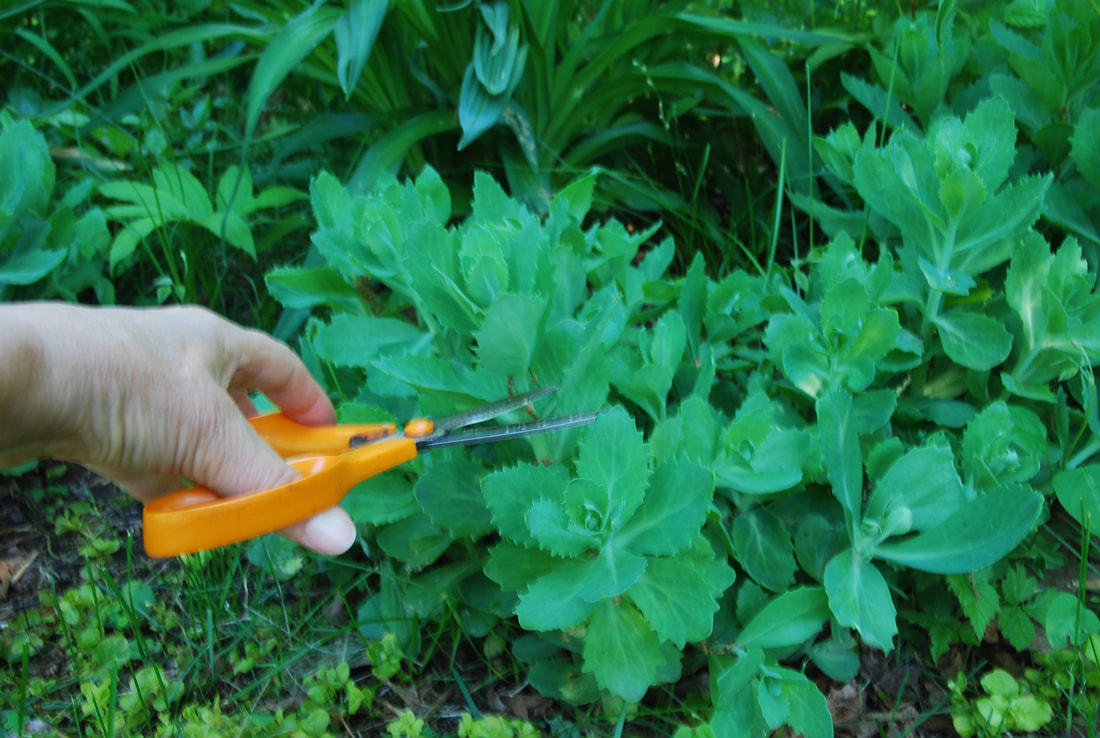
Techniques
Deadheading is the removal of old or spent flowers and is beneficial to most herbaceous ornamentals. Seed production can drain a plant’s energy and cause foliage to deteriorate. Deadheading can promote vegetative and root growth rather than seed production. By deadheading you can prolong bloom periods, initiate a second smaller bloom, improve overall appearance, and prevent self-seeding. Some examples of species that benefit from deadheading are: Daylilies, Hostas, Lady’s Mantle, and Lambs Ear. Cutting back refers to pruning a plant to renew its appearance or encourage a new flush of growth or flowering, control its height or flowering time. Pinching can accomplish the same objective. If you travel for several weeks, you can cut certain plants by one third to delay bloom time until you get back home. Examples: Dianthus, Candy Tuft, Moss Phlox, Catmint, Geranium Amsonia, Baptisia, Achillea, Aster, Mums, Sedum, Joe Pye Weed. Pinching allows for experimentation and usually involves removing only the growing tips. Generally do this early in the growing season because it will delay bloom time. Examples: Sedum, Shasta daisy, Joe Pye Weed, Aster, Artemisia. Thinning can prevent disease, create sturdier stems, and increase the size of flowers. It can often help to increase air circulation to help prevent powdery mildew. Use this on: Aster, Delphinium, Mondarda, Phlox, Bulgeweed, Lambs Ear, and Lady’s Mantle. Disbudding involves removing side buds so that the plant’s terminal bud produces larger flowers on a longer stem. Removing the terminal bud will cause the side buds to produce smaller but more flowers; it can also eliminate the need for staking. Examples: Mums, Carnations, Pinks, Dahlias, Peonies. Deadleafing removes individual dead leaves to improve appearance. Examples: Elijah Blue grass in spring, Lady’s Mantle in summer, and Hellebores (Lenten Rose) in the spring. A great source of information on all these techniques is The Well-Tended Perennial Garden by Tracy DiSabato-Aust, Timber Press, 2006. Article and photo credit: Sue Reinardy, Master Gardener
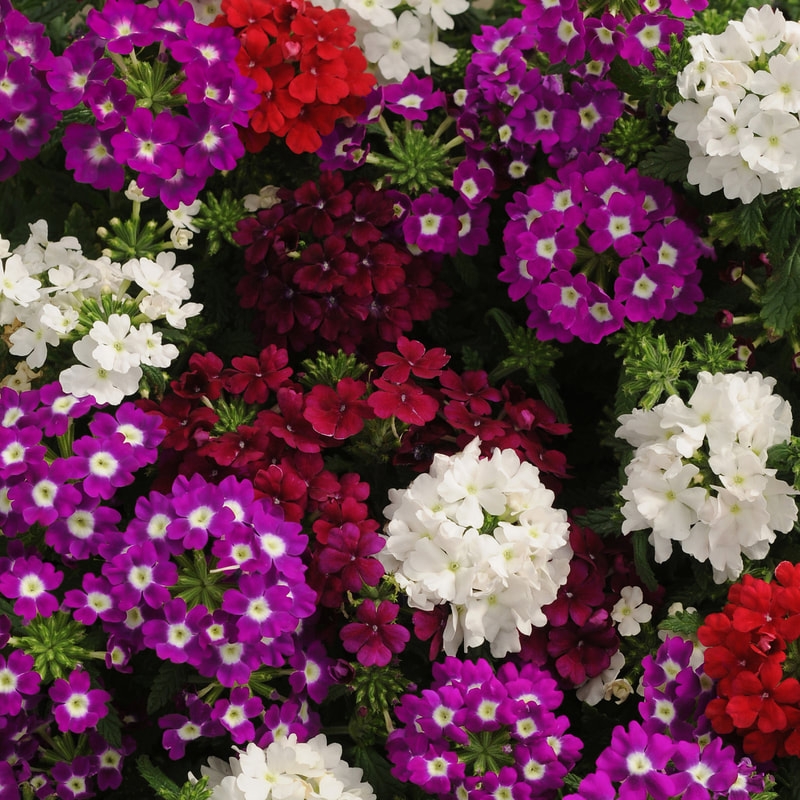
Pollinators love verbena! Hummingbirds, butterflies, and moths are all frequent visitors. Bees of all types love verbena, too. Known for withstanding the pressure of hot, dry conditions, Verbena is a member of the Verbenaceae family, which is comprised of 800 species in 32 genera, many of them native to the Americas and Asia. This family is characterized by clumps or spikes of flowers on heat-loving herbs, shrubs, trees, or vines. There are many varied types and habits, including upright and tall, as well as mounded and trailing. Some verbena make great ground covers as well.
Hybrid varieties generally have larger flowers, brighter and more saturated colors, and larger, more weather-tolerant leaves than their species relatives. bred to be more heat, water-stress, and disease tolerant (especially powdery mildew). Leaves and foliage are often dense and, in many species, “hairy.” Its flowers are small with five petals, arranged in dense clusters. Typical colors include shades of blue and purple, but they can also be found in white and pink shades. Others are bred to withstand heat and humidity with flowers and bulky growth non-stop through the growing season. While verbena seed is available, many of the newer varieties that have the desirable traits are vegetatively propagated and can be found as young plants at your local garden retailer in the spring. Verbena looks their best when their soil is kept moist, but not wet as they do not like soggy feet. If the growing medium dries down too much, it can cause flushing, commonly known as cycling-out-of-color where the plant loses blooms but remains green and leafy. Verbena plants should be placed in sunny locations, aiming for 6+ hours of direct light. Most species perform well in the ground, landscape, hanging baskets and patio containers. For the compact-growing verbena, those work best in pots and do not have the root vigor for garden bed applications. For prolonged flowering, deadhead verbena by removing spent flower heads. Powdery Mildew (PM) is an unfortunate occurrence on some verbena. The best practice is to look for newer varieties that have a built-in resistance. If PM does appear (it will present as white patches of fluffy fungus on leaves or stem) treat with a neem spray or your favorite fungicide. Catching PM early is the best solution, as this disease can spread quickly, and its fungus blocks sunlight to the plant’s nutrition system, making the plant unable to produce food, which will ultimately cause the plant to perish. Gardening with verbenas can elevate your landscape design and add texture and color to your patio containers. You’ll appreciate their colorful branches and how well they play with other flowers in your garden. Credit to https://ngb.org/year-of-the-verbena/ Contributed by: Vicki Gee-Treft, Master Gardener Volunteer  Growing GREENS, which can be served raw, wilted, blanched, sautéed, or grilled.
The Asteraceae family has some of the best-known salad greens:
Most greens prefer full sun and cool weather (50 to 75°F). Soil that’s evenly moist, but not too wet, yields the best greens. As a general guide, spinach, kale, and mustard greens can be sown six weeks before the last frost, followed by lettuce and chard three weeks later. You can choose to transplant seedlings to get a jump on the season or sow seeds directly into the garden or containers. To ensure a continuous harvest, reseed as often as every few weeks depending on the variety. Note, store seed in the fridge in an airtight container to extend longevity. To prepare outdoor soil, consider mixing in 1 cup of organic fertilizer for every 10’ row. For containers, choose one that is large enough that it won’t easily dry out. Fill with quality potting mix and consider mixing in peat and coir (coconut fiber). Planting depth varies by variety, so be sure to read seed package instructions. After germination, thin seedlings to desired spacing. If your goal is baby leaf, keep the spacing fairly dense. If you’d like to harvest whole heads, ensure spacing of 4”-8” apart within a row. For baby leaf, you can start harvesting when leaves are 3-4” tall. Many varieties will tolerate “cut-and-come-again” harvests. Allow full-size heads 3-5 weeks after transplant to mature. Once leaves reach maturity, harvest right away to encourage new growth and another harvest in just a few weeks. Leafy greens will have different flavors at different stages of harvest. Experiment to find out which flavor works best for you! As much as possible, monitor for over-exposure to heat and water to avoid “stressed greens” that taste bitter rather than fresh. When plants bolt (or send up flower stalks), pull them up as the quality will start to diminish after this. In our colder region, hardier greens like kale, mustard and spinach extend our season, and row cover protection can help achieve an earlier first harvest in the spring and a later final harvest in the fall. Use your fresh salad greens in unexpected ways. Red Butterhead makes a fabulous and healthy burger wrap. Grilled Romaine? A tasty twist on an old favorite. Wilted spinach? It’s incredible. Massaged kale? Pair bitter greens with a sweet dressing and your favorite soft cheese for a gourmet flavor combination. Sturdier greens like romaine, kale, and chicory hold up well when mixed with grains, nuts, and thick dressings. Choose a theme and create a new and interesting salad mix every time. Try it and you’ll be hooked! Credit to https://ngb.org/year-of-the-salad-greens/ Contributed by: Vicki Gee-Treft
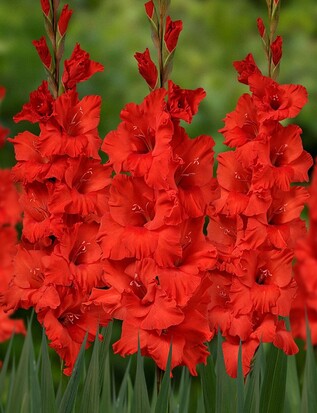
Part of the iris family, a “glad” is often described as a flowering bulb, but the bulb is actually a “corm.” Each year the plant produces a new corm and discards the old one. In our zone 3 climate, the new corm is dug up in the fall, has its stem and leaves removed (all but an inch), then dried for 1-2 weeks in a warm place with good air circulation, and finally stored dry, indoors at about 50 degrees for planting next spring. Gladiolus should be grown in full sun, whether in a cutting garden, perennial garden, vegetable garden, raised bed or container. Be creative, put glads front and center, pair them with cannas, colocascia (elephant ears), caladiums, or coleus. Explore planting a variety of types, heights and flower color, form and size. The flowers generally begin opening 80-90 days after planting. To extend the bloom time, plant the first batch in spring after all danger of frost has passed, and plant additional corms every week or two until early summer. Before planting, prepare well-drained soil to a depth of 6 to 10”, adding compost and an all-purpose granular fertilizer. Plant “grandiflora” glads 6 to 8” deep to help keep their stems upright and “dwarf” glads at 4 to 6” deep, spacing both types 4 to 6” apart. After planting, applying 2 to 3” of mulch helps retain moisture and control weeds. Water regularly and deeply, at least an inch of water per week. When stressed by heat/drought, glads are susceptible to disease and thrips/spider mites that disfigure the flowers. Support glads from leaning or toppling from wind or rain by tying them to bamboo canes—or plant shorter, 2-foot glads. High-quality, larger corms will give you taller stems with more flowers. For the longest vase life, harvest glads when the bottom two flowers are fully open. The rest will gradually unfurl in the vase. If you experience difficulty with integrating taller glads in a tabletop arrangement, shorten the stems and remove a couple of the lower flowers or cut some of the top. Snap off spent flowers and recut the stem as needed. Credit to https://ngb.org/year-of-the-gladiolus/ Contributed by: Vicki Gee-Treft, Master Gardener Volunteer
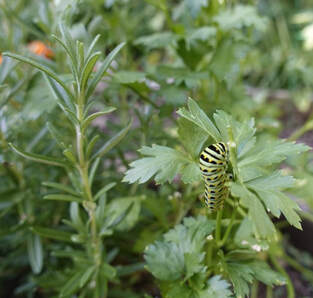
Thyme (Thymus vulgaris) Very versatile herb has many uses in cooking. Hardy perennial (zone 5), great for containers, rock walls, or garden. Thyme needs full sun in light sandy well drained soil, do not over-water or fertilize. Doesn't do well when competing with weeds. Flowers in summer, pollinated by bees. Rosemary (Rosmarinus officinalis) Classic herb used in many meat and vegetable dishes. Very tender perennial grown as an annual in our region, I have tried to bring this plant in several years however is did not survive. It can be difficult to bring indoors. Great plant for containers or garden, full sun and well-drained soil, drought tolerant and will flop over if watered too much. Giant of Italy Parsley (Petroselinum crispum)This variety produces a bushy plant and a continuous supply of flat leaves with strong parsley flavor. This plant is hardy for Zone 5 to 9. This is grown as an annual in our area. It can grow in pots or garden; in full sun and rich, well-drained soil, water adequately (especially if in container), host plant for swallowtail butterfly caterpillars. Genovese Basil (Ocimun basilicum) A classic annual, large leaves are very aromatic. Very tender, needs to be covered when night time temps dip below 50. Annual ~ fragrant plant growing 18-24”. Plant outdoors after any danger of frost and soil temp is 70⁰, plant in full sun in light well-drained soil, great plant for containers or in the garden, when plant starts to flower pinch back to extend growing season. Garlic Chives (Allium tuberosum) Tends to look like an onion but has the mild taste of garlic. Pick the flattened leaves for cooking. White star shaped flower clusters are a pleasant surprise in late August. Very hardy perennial ~ in zones 4-8, reseeds readily, plant in full sun to part shade in well-drained soil, keep moist, great plant for containers (can be slightly invasive), cut back in fall and bring container indoors, keep cool & dry until spring, then put in a window, water and watch for new growth. Bouquet Dill (Anethum graveolens) A prolific producer of edible flowers, leaves and seeds, all which can be used for flavoring everything from pickles, potatoes, and fish. Hardy annual, readily self seeds, fragrant plant growing 6”, bolts in very hot dry weather so water adequately in droughts (early morning), drought tolerant, needs shade from sun, and can tolerate part shade. Preferred plant to swallowtail butterfly caterpillars. Contributed by: Jill Schmalz-Washkuhn, Master Gardener Volunteer
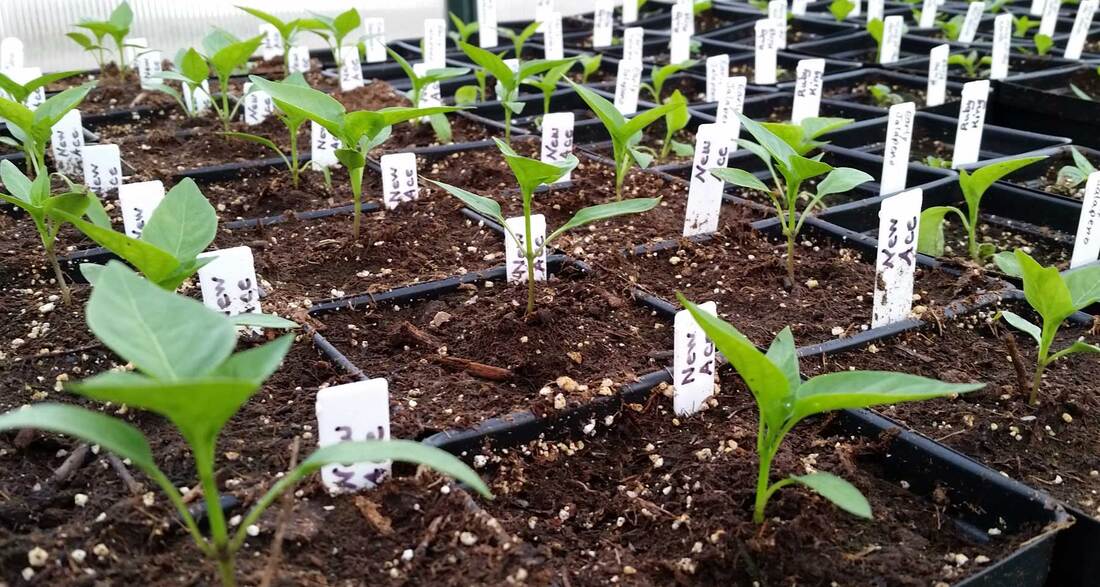 Seed starting indoors can be a great way to satisfy that craving to get out into your garden before Mother Nature cooperates, however, there are some rules of thumb to follow to keep that thumb green. Read on to discover seven common mistakes on starting seeds indoors, based on great insight from Kerry Michaels as well as our own Pam Davies:
Additional resources: https://extension.umn.edu/planting-and-growing-guides/starting-seeds-indoors#hardening-off-seedlings-1179860 Author: Kimberly Kayler |
|
| North Country MGV | gARDEN bLOGS |
 RSS Feed
Location |
|