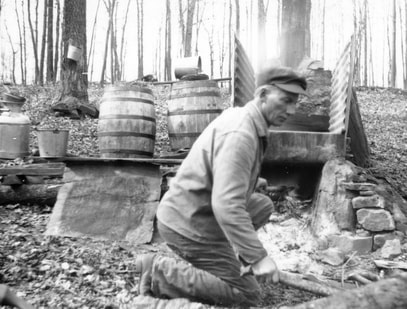
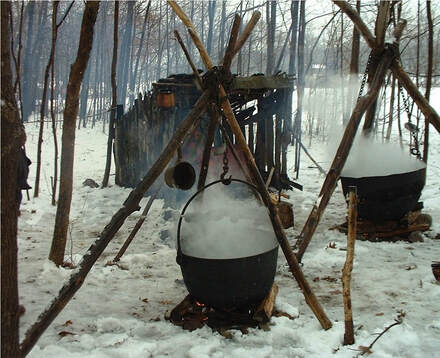
 Making maple syrup circa 1918 Making maple syrup circa 1918 ,Sequel to: Sugar Maple Sap is on the Run!! Once you have collected your buckets of sap from your sugar maple trees you will want to process it as soon as possible to avoid bacterial contamination. The processing will produce the thick rich amber color that we expect from maple syrup. Straining, boiling, and skimming constitute the processing. You will stain at the beginning and end of the processing, in the middle you will boil and skim. Strain your fresh sap through about 10 layers of cheese cloth, or a clean white cotton weave (not terry) dish towel or specially made filters, in a sieve or colander or filtering frame suspended over a clean bucket or the pot in which you will be boiling the sap. Straining gets out any debris that got into the sap during tapping. If you can't process your sap right away store it refrigerated. Unless you are doing a small batch, you will want to do the initial boiling out of doors as the steam that rises off the boiling sap will be thick and sticky. You will need a heat source (a wood fire and plenty of wood or a propane cook top), a large wide pot (aluminum, enamel or heavy iron), a large skimming spoon and a candy thermometer. Your fire should be nice and hot before you start and your pot should be securely suspended above it--on a grate suspended between cinder blocks possibly. Fill your pot about 2/3 full to begin as it will come to a boil more quickly. If you have multiple pots and a big enough fire you can cook down more sap at once. You will be feeding the fire and watching the boiling pots so plan on spending the full afternoon on this process. Add sap to your pot as it boils down but be careful not to splash the hot sap onto yourself. Add only enough sap that you keep the boil up to keep the evaporation process moving along. Foam will form on top of the boiling sap. Skim off the foam and discard periodically. Use the candy thermometer to check the temperature of the boiling sap. As the water boils out the temp will rise. The sap will be done when the temperature reaches 219 degrees (7 degrees above the water boil temp at your altitude for your thermometer). If you are working with a small enough batch you can do the final boil to temp on your stove top in the kitchen. When the boiling sap is ready it will be very foamy (do not skim this foam). At 219 degrees the syrup will still seem thinner than you want it to be but as it cools it will thicken up. Cool it down a bit before straining again. Once it is strained, bring back to 200 degrees then ladle into sterilized, preheated pint or quart jars to 1/2 inch from the top, wipe the rim, cover and tighten rims to snug. Let cool slowly out of any draft, on a towel with a few inches air space between the jars. If you get a good seal--the lid pops and dimples inward as it would when canning--you can store the jars at room temp. Otherwise, store in the refrigerator as you would an open jar of syrup. You can also process in a water bath as you would jelly or jam. If you find you really like the process of taping your trees and making your own syrup, there are many supplies that you can purchase online or at hardware stores that will make the process easier and more exact. Here are some articles on processing your sap into syrup: https://files.dnr.state.mn.us/destinations/state_parks/maplesyrup_how.pdf https://ouroneacrefarm.com/2014/03/17/make-maple-syrup-ii-boiling-filtering-canning/ There are lots of YouTube videos on processing your maple syrup. All of them have a little bit different take on how to do it. Here are a few videos (do a Google search on "how to make maple syrup YouTube" for more) : https://www.youtube.com/watch?v=OAmuFLz8Tek https://www.youtube.com/watch?v=xKA3NfQSrtk https://www.youtube.com/watch?v=jwz0ywwuk4U https://www.youtube.com/watch?v=Q_bPW6Ig8iM Article by Pam Davies MGV
2 Comments
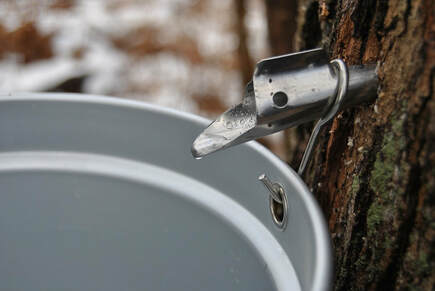
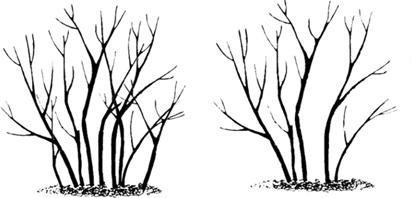
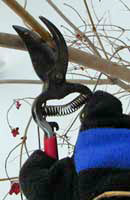
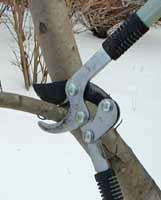
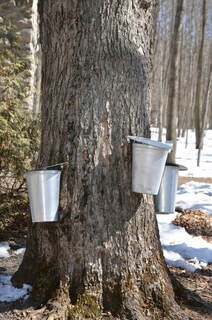 If you live in NW Wisconsin, this is the time of year when, you will see buckets hanging from trees. The trees are sugar maples and the sap is sweet and running up the trees from the roots to get the spring leaf buds going. The sap runs when the days are in the 40s and 50s and the nights are below freezing drawing the sap back down into the roots. The cycle begins again when the temp once again rises and will last until night time temps are above freezing and the leaf buds open out. If you have a sugar maple tree that you want to try to tap, get yourself a 5/16 inch drill bit, a cordless or hand drill, a hammer, a tapping spile and a bucket with handles. White plastic food grade buckets work well. Mark 2 inches on your drill bit with a marker or a piece of tape. Note: you will also need a sugar maple tree at least ten inches in diameter. On the south or west side of the tree about four feet off the ground, drill your hole at a slight upward angle, tap in your spile gently so as not to go too deep or split the bark then hang your bucket. The sap will appear watery and colorless or almost colorless and only slightly sweet. Check your bucket daily or more often if the sap is really on the move or your bucket is small. You will need to change out the bucket or empty it into another when it is full. The bucket will be very heavy if left to fill up to the top so change it out while you are still able to handle the weight. If the outdoor temp is above 45, store your sap, covered, where it will stay colder. A sheltered shed or garage that stays colder will do fine. You will need 10 gallons of sap to make 1 quart of syrup. You can place up to 4 taps per tree if it is at least 25 inches in diameter. When you have all the sap you need or the sap is changing color or nighttime temps no longer drop below freezing, simply pull out the spile, the tree will heal up in a few weeks. Don't reuse the hole next year. More info on tapping your sugar maple trees: https://www.wikihow.com/Identify-Sugar-Maple-Trees https://www.youtube.com/watch?v=tvWMdF0QkKA https://www.vandeheys.com/maple-syrup-season-in-wisconsin/ Next time: Making Maple Syrup Article by Pam Davies MGV 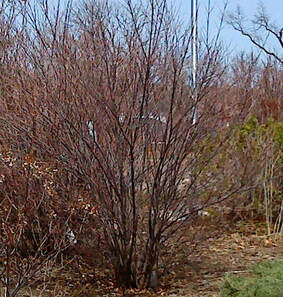 Now is a great time to get out there and prune your deciduous scrubs while they are still in a dormant state from their long winter nap and have not started leafing out yet. Many shrubs have a lovely natural shape and if you have made allowances for their mature size, will need only minimal pruning. Cutting out dead and diseased branches is important to the health of your shrub. Proper pruning is also important when you want to control the size and shape of your shrub or when it has gotten totally out of control and you need to rein it in. Severely pruning an overgrown shrub that is beginning to fail can rejuvenate at. Overgrown spirea and potentilla can be cut down to a few inches from the ground for complete rejuvenation while other scrubs would not survive such extreme pruning and will need to be rejuvenated over two or three years of less severe pruning. Do not prune shrubs that flower in the spring such at lilac, weigela, or forsythia as you will be pruning away the flower buds for this years spring display. Prune these right after they are done flowering unless they are in a bad way and will not give you a good display of flowers then go ahead and prune for future year flowering. Late winter/early spring is great for pruning spirea, potentilla, boxwood, viburnum, American Cranberry bush and ninebark (if you do not care about blooming) among others. Google "when to prune" followed by the type of shrub for specific instructions for your shrubs. Thinning out dead or old branches, heading back a branch to the joint with another branch or to a leaf bud, rejuvenating or cutting back the entire shrub severely, sheering with hedge sheers to create shape, and pinching off shoot tips are the basic pruning techniques. These techniques may not be appropriate for all shrubs. Without leaves, you will be able to see the wood and the shape of the shrub very well. Look it over closely before beginning for dead or diseased branches and any branches that run counter to the prevailing direction of the other branches or are rubbing up against other branches. Now notice which branches look old and which are the newer growth by diameter. Now that you have really looked at the plant, begin by cutting out all the dead and diseased wood down to the ground. Then prune out old wood, the biggest and gnarliest branches, down to the base of the plant or as close as you can get. If the plant is too overgrown, this may be difficult; gloves and even goggles will help you survive this ordeal. Next, look at those branches that are counter to the direction you want to encourage or are rubbing against other branches causing damage. Cut these down to just above the collar of the branch (where the branch meets the main branch) or cut them down to the ground if need be. Try not to prune more than about one third of the total volume of the scrub. Lastly, you will prune for size and shape where appropriate. Keep in mind that when pruning for size and shape, unless you are sheering a hedge, you will want to look carefully at the branch to determine the best place to cut. Cut back only as much as you need to of the secondary branching. Cut just above an outward facing leaf bud cutting at an outward and upward angle being careful not to damage the leaf bud or, if you must cut the whole secondary branch, cut just about the collar (not through the collar) where the branches meet. You will need: Gloves to protect your hands from sharp twigs and spikes. Eye protection is a good idea too. You will want a good set of sharp hand pruners. For larger shrub a bypass lopper (as opposed to an anvil type lopper) and a pruning saw are recommended. Make sure these tools are sharp and clean. They should also be disinfected between cuts with rubbing alcohol or 10% bleach to water to reduce the risk of spreading disease. Here are some useful link from pruning deciduous shrubs
Final installment of Seed Starting Indoors Part 1 Seed Starting Indoors Part 2 More on Seed Starting Indoors The biggest mistake I make with my seedling is giving them too much sun and wind when I bring them outdoors for the first time. The poor little guys get their leave singed and some get blown over and have to be staked up. After spending so many weeks tending these seedlings, you would think I'd be a little more careful. But it is easy to get busy cleaning out beds and getting ready for planting. The sun moves and what was dappled shade becomes direct sun in a short time.
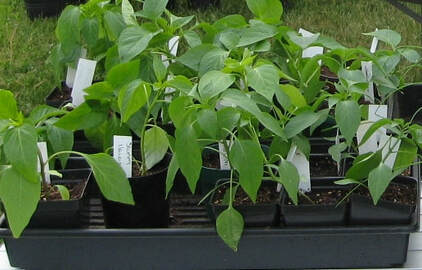
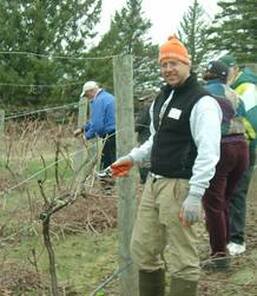
The sun in late May is very powerful and can burn the tender leaves of even the hardiest plants when they haven't been "hardened off" yet. Hardening off is the process of acclimating the seedlings to the outdoors before planting them in the garden. (You will want to harden off store bought seedlings that have been sheltered in a greenhouse as well). This will take at least ten days to two weeks. Begin hardening in a sheltered spot in shade then dappled sun for a few hours the first few days, increasing exposure until the plants are reveling in their new environment. Do not fertilize during hardening off. The plants will be under stress adapting to these new conditions. Do water them before they wilt. They will dry out quickly in the sun and breeze. After the first 4 or 5 days of hardening during which I bring the seedlings indoors at night, I have a couple of wagons that I put my flats into and pull them into the garage at night where they will get accustomed to the cooler night temps as the garage is detached and not heated. Toward the end of the hardening off period you will be leaving the plants outdoors fully exposed through the night unless nighttime temps get into the 30s or low 40s especially for tomatoes and peppers. https://extension.umn.edu/planting-and-growing-guides/starting-seeds-indoors#hardening-off-seedlings-1179860 Before planting in the garden, be sure that soil temps are warm enough to encourage root growth and avoid putting your seedling into shock. The warmer the better is a good rule of thumb. Hardy plants such as broccoli, Brussels sprouts, kohlrabi, cabbage, onions, leeks and parsley can take ground temps as cold as 40 degrees but if they have been started indoors and are not used to those temps you might want to wait until the ground warms a bit more. You can sow these seeds directly into the ground at these soil temps. Half-hardy plants such as celery, Chinese cabbage, lettuce, and endive can take soil temps down to 45 degrees. Tender plants will need soil temps of at least 50 to 65 degrees. Basil, tomatoes and peppers, need the warmer soil temps. Squash, pumpkins, and sweet corn can take the cooler while Cucumber and muskmelon like the middle range. One rule of thumb uses the science of phenology as the test of when to plant. Phenology looks at what is happening with other species and times the planting season by how other species are developing. For instance, when lilacs are in full bloom plant your veggies is an over generalized rule of thumb; phenology can get much more specific. Here is a link to a UW-Madison Extension article on phenology. https://hort.extension.wisc.edu/articles/phenology/ Some people like to plant by moon phases once the threat of frost has passed. Check out this Mother Earth News guide to planting by moon phases https://www.motherearthnews.com/organic-gardening/living-homegrown-how-to-schedule-your-planting-by-the-moon Your beds should be fully warmed and the soil turned to a depth of at least 8 - 12 inches depending on what you are growing. Working the soil when it is too moist will create clumps that will harden and be inhospitable to your seedlings. Wait until the soil is dry enough that it will break apart when turning it. Turning with a shovel can be better than using a tiller as a tiller can create "hard pan" below the blades that will discourage root penetration and good drainage. If you have a large garden, however, a tiller may be the only way to go. Till every other year or so to avoid hard pan build up. Take care to walk only in paths to keep your tilled soil from becoming compacted by trodding on it. Amend the soil as needed before planting. Add some peat or Perlite to loosen up compact silty soil. If you have a lot a clay in the soil you might want to add some sand as well. A good friable soil will contain silt, sand and clay as each contributes to the proper texture of the soil for root growth and drainage, and the ability of the soil to hold moisture and nutrients. Adding organic matter to this mix (peat or decomposed leaves, wood chips, bark or straw) provides nutrients and a medium for beneficial bugs and bacteria to thrive. Add fully composted manure (100%) to your soil if you think it is depleted. (Watch for a soil testing article on this site). Mix your amendments into the soil well and let it sit for a few days or longer before planting. This lets the soil settle out to a more uniform texture and temperature and allows microbials to get going. Once your plants are in the ground, water them then use the same week fertilizer solution (quarter strength) that you used on your seedlings. This will give the seedlings a little boost to get started and help them not go into shock in their new environment. After that, water as needed but sparingly to get the seedlings used to dealing with a less regular watering schedule but don't let the seedlings wilt. You will want to think about mulching to keep moisture in and weeds down. Laying down newspaper (2 or 3 pages thick--no color ink) around the plants then covering this with chips, grass clippings, straw, or leaves is a tried and true method. The paper and mulch will decompose over time and can be dug under in the fall or raked aside, dried and covered, and used for mulch in the spring. A couple of notes on mulch. Straw, hay, grass clipping and leaves can bring with them weed seeds. You can sprinkle a pre emergent such as Preen or corn gluten meal over the mulch to keep weeds from germinating in the mulch. Also, be aware, if you are having a particularly wet spring or summer you may want to push the mulch away from the plants so the soil has a chance to dry out. A good drying out cycle between rains or watering helps to keep down fungal growth. Plant spacing and exposure to wind also helps to keep fungus at bay. Mulching https://www.veggiegardener.com/best-mulches-to-use-in-the-vegetable-garden/ A few notes on starting seeds in the garden, do not mulch until plants are at least a few inches tall. Be careful not to get pre emergent on beds that will be seeded as this will prevent germination. Seeded beds must be kept moist so will need to be monitored at least twice a day. You can cover the seeded beds with a plastic tent to keep moisture in while seeds are sprouting. Good luck with your seedling, have a great growing season and watch for more articles here! Whether you are interested in making your own wine from you own grapes, or taming that unruly grape vine in the backyard to get a taste of a grape or two before the birds get to them, we have a workshop for you, free and open to the public! Pruning is the key to success with grapes, as well as choosing the optimal varieties for our area. Learn about grape culture in NW Wisconsin by a seasoned professional! This workshop will provide participants with a list of appropriate varieties that can be grown in the region and stress the importance of proper site selection and trellising. Grapes are very vigorous and can benefit from proper training and pruning. The program will include a short indoor presentation in the Ag Station meeting hall, followed by a hands-on pruning demonstration in the horticulture display garden.
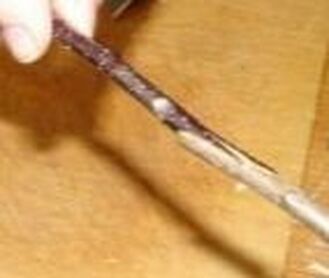
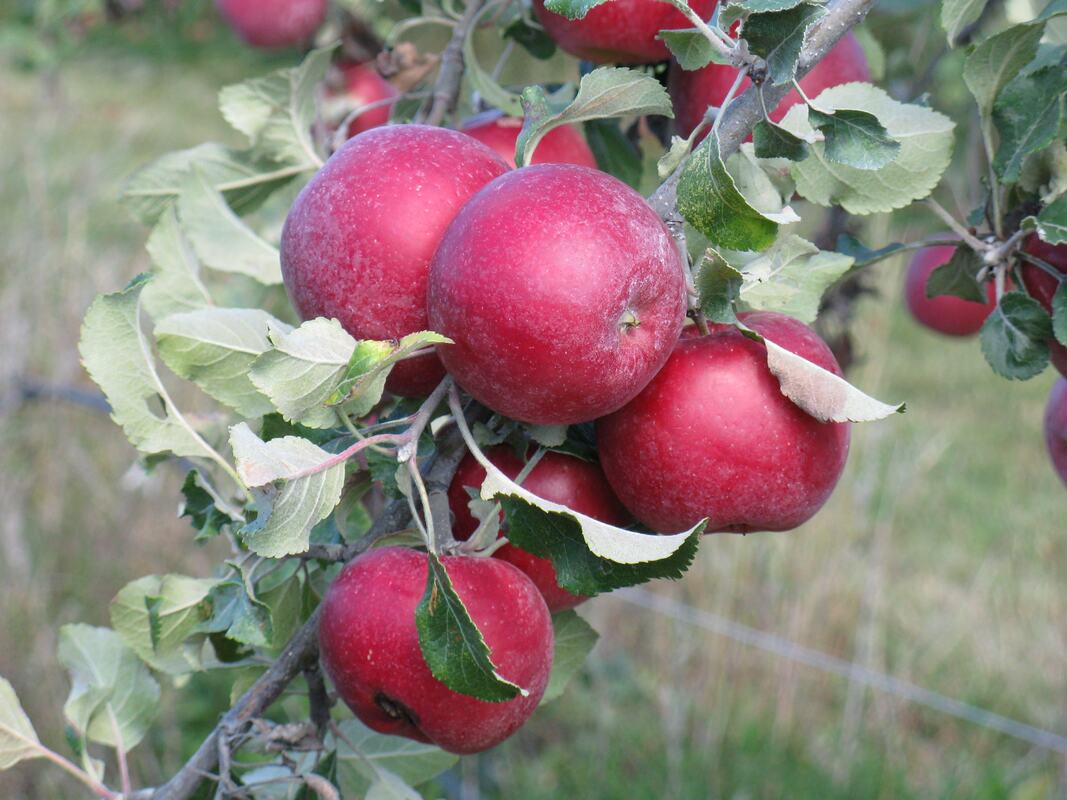
Grafting is an art form as well as a science. Why graft? Because you can't get great apples from seeds! The answer may seem simple but the practice is ancient and the steps are exacting. Get your questions about grafting answered and learn how to successfully graft a pleasing variety of apple to hardy rootstock to get the apples you want. Northwoods residents can learn the basics of successful grafting at an upcoming Apple Grafting Workshop. Kevin Schoessow, Area Ag Development Agent, will lead this workshop. Each participant will receive three hardy apple rootstocks. Apple bud (scion) wood from different varieties will be available for grafting or participants can bring their own scion wood.
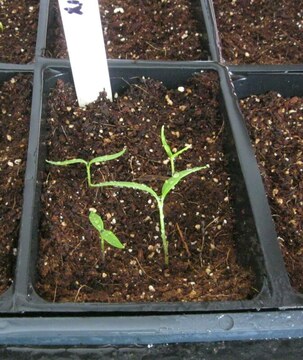
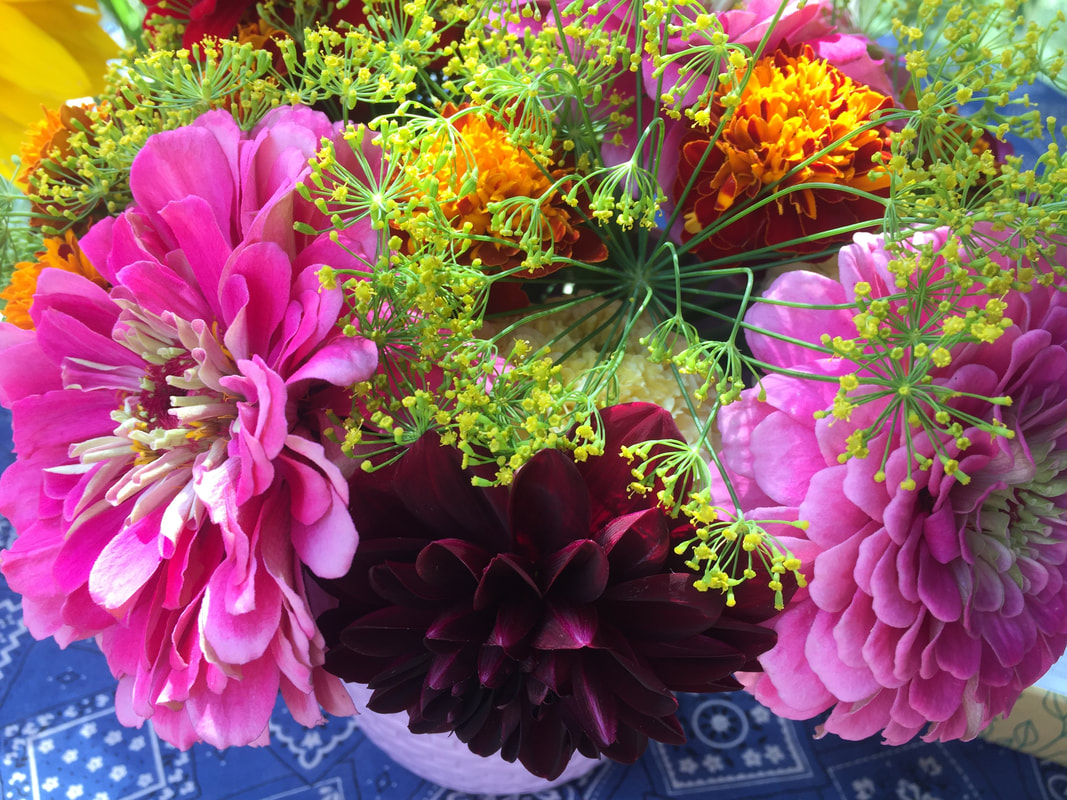
Part 2 of Seed Starting Indoors Like many gardeners, I am thinking about next year's garden even before the snow flies. My mind is on spring seed starting in the fall as I am putting the gardens to bed. When all is done and my potting shed organized, I pull out my seed starting trays and containers. My potting shed will be snow bound in the dead of winter so bringing my supplies up to the garage in the fall saves getting the snow shoes out and launching an expedition. Getting ready in late winter works well too and can be a great "cabin fever" activity. Seed packets, starter mix and containers will have started appearing in the stores in late January and February. Seeds will sometimes be discounted this time of year as well. Whether you buy new or reuse your equipment year after year, it is recommended to sanitize your containers before starting. You can wash them in hot soapy water and rinse well or just submerge them in a tub of water with 10% bleach for a few minutes. In the fall, I like to pre-fill my containers with a mixture of potting soil and starter mix and arrange them in the trays. I then store the trays stacked one on top of the other in a large plastic bag in the cold garage away from exhaust so I'm ready to go in the spring. Because soilless starter is great for getting seeds started but not ideal for growing seedling, mixing starter with potting soil is, for me, the best of both worlds. My containers are six-pack plant containers left over from seedling I buy at the garden center. I arrange them in plastic mesh trays set into leak proof trays (flats from the garden store). When I'm getting ready to sow my seeds, I will bring the trays in from the garage and let them warm to room temperature (65-75 degrees is ideal). Then I saturate the soil well by filling the tray with about a 3/4 inch of water and let the containers soak up the water from the bottom for 15 or 20 minutes then lift out the mesh tray of containers, and dump any excess water. Keeping the soil moist is essential for starting seeds and nurturing seedling. The soil should be visibly wet but not sodden. Stick your finger in to feel the moisture. As it dries out note the change in color of the soil. I use a spritzer to keep the soil moist, spritzing twice a day or more. Until the seedlings emerge you can cover them with a plastic lid to keep the moisture in but be careful of fungus developing. Once the seedlings have emerged, uncover and use a small fan on low for at least part of the day to keep the air moving. This will help prevent fungus and encourage strong stems but it will also dry out the soil so it is necessary to keep tabs on your trays to spritz as needed or re-saturate the soil from below if it seems to be drying out too much to keep up with the spritzer alone. If I have fresh seeds I will try to sow six seeds per container as I am fairly certain I will get near 100% germination. If I sow more seeds I will thin out the excess seedlings by pinching them off or snipping with a small scissor. This is actually quite painful for me. I really hate to kill off little plants. If I am being soft-hearted, I will prepare a six-pack container with moist potting soil, make six indentations with my finger then carefully dig out the excess seedlings with a small spoon and transplant them to the new container (see video link below). If you must touch the seedling, gently grasp them by the leaves as the stems are very tender at this early stage. Label, label, label!! Too often I have labeled only one container in a flat for each type of plant. I know that the one next to it is the same so why waste time labeling them all. Later I will get confused about which unmarked container belongs with which label. If I have more then one variety of tomatoes, for instance, this is a real problem as I won't know which one is which. So now I label everything. I will use these labels in the garden anyway so there really is no wasted effort. Once your seedlings have several sets of true leaves (more than just the first two cotyledon leaves), you can start thinking about fertilizing. A weak (1/4 strength) all purpose, water soluble fertilizer applied once a week will do just fine. Over fertilizing can kill the young seedling so less is better. My seedlings will remain in the six-pack containers until they are about 5 to 6 inches tall, then I will transplant them (pot up) into 4 inch pots, one seedling per pot. Depending on when you start your seedlings, you may not need to pot up but can plant them directly into the garden from the six-pack container when the sun warmed soil is ready and there is no chance of frost. As my grandmother used to say, "there is more than one way to skin a cat." Sounds a little gruesome but the point is there is no single right way to start seeds indoors. Some folks like soilless starter mix, or a potting soil, peat and perlite mix or just plain potting soil. You might prefer peat pots or starter plugs or making their own paper pots to plastic containers. All there methods work so experiment to find out what you like and what works for you. Do Google searches on "seed starter vs potting soil," "peat pots vs plastic," "potting up seedlings" for a variety of article and videos. Potting up video Potting up broccoli video Watch for Seed Starting Indoors part 3 where I will talk about hardening off seedlings and planting them in the garden. Article by Pam Davies, MG volunteer Photo credit: Carla TePaske ~ using dill to create a bouquet The Pleasure of Herbs Herbs activate all of our senses, inviting us to touch, smell and taste them.
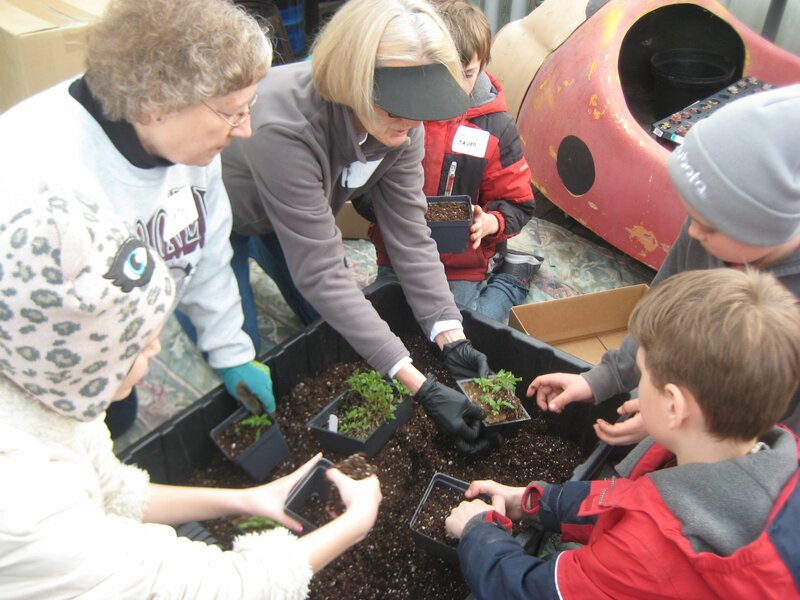
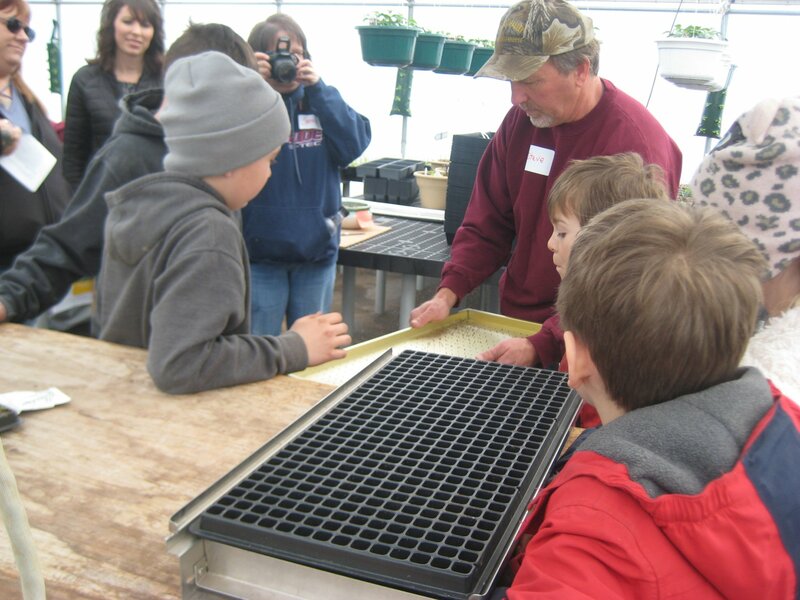
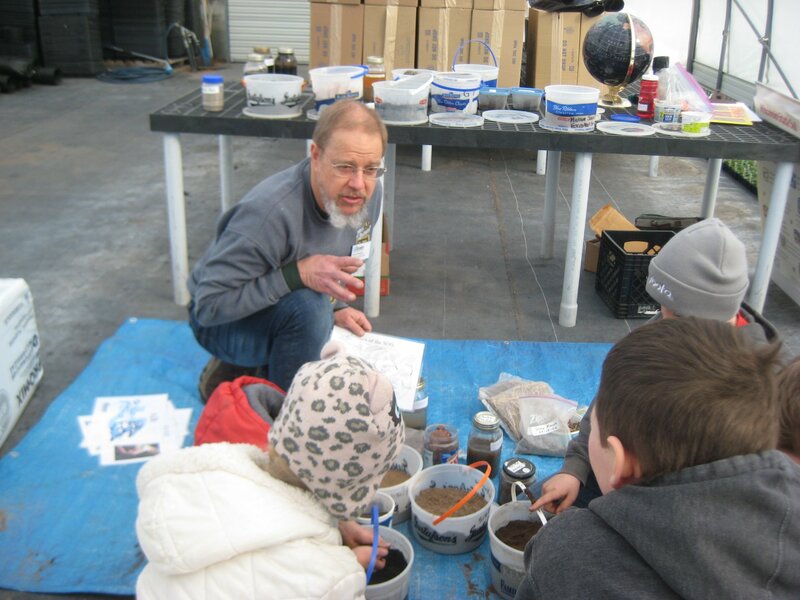
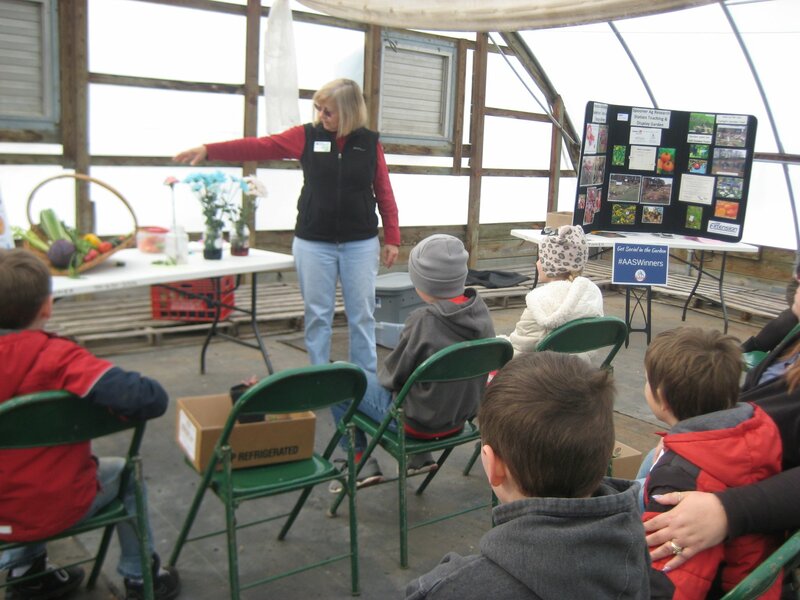
Photo credit: Carla TePaske The Herb Six Pack A collection of herbs used to flavor food dishes of all kinds. Genovese Basil Garlic Chives Bouquet Dill Giant From Italy Parsley Rosemary Thyme Come to the Plant Sale, May 18th to get your Herb Six Pack $12.00 for the six pack Care tip brochure and recipes will be at the sale North Country Master Gardener Volunteers Annual Plant Sale, Saturday, May 18, 8:00 to 11:00 (or until plants last) at the Station Building, 1035 E Maple Street (Hwy 70), Spooner. Offerings include: Heirloom Tomatoes, Peppers, Natives, Herbs, and Cannas AuthorCarla TePaske, North Country MGV It is not too early to start thinking about how to get those kids out into the garden this summer. North Country Master Gardeners are gearing up for this year's Mini-Master Gardeners program. This fun program is open to ages 5 and up (must be accompanied by an adult). A full morning of demonstrations and hands-on activities conducted by Master Gardener Volunteers with keep the kids enthralled! Check out the fun we had last year! Class size will be limited to 30 children. Pre-registration is required. All fees will be collected at the door.
When: March 30h, 2019, 8:30am – 12:00pm Where: Bashaw Valley Greenhouse, W7402 Fox Trail Road, Shell Lake, WI 54871 Cost: $5/child; $10 per family; Adult chaperones are free. Registration Required. Contact: Lorraine Toman, call 715-635-3506 or email [email protected] Starting seeds indoors is a great way to get your fingers in the soil when a blanket of snow covers the gardens and it feels like winter will never end. Just smelling that seed starter is enough to raise anyone's spirits! Picking through my seed box with my mind on the glorious day I'll be out in the garden planting seedlings and sowing into the sun-warmed soil, I wonder how old some of these seeds are and will I get good germination. Some seeds are better in the long run than others and of course when saving seeds it is always good to date and source your seeds--not so hard when you buy packets with the dates right on them but if you tear off the top and toss it and don't use up all the contents, you may have lost that important information printed on the flap. Among the seeds that last longest in dry cool storage, 5 or more years , are some favorites:
Beets, broccoli, Brussels sprouts, cauliflower, cabbage, cilantro, cucumber, lavender, lettuce, melons, mustard, oregano, peppers, radish, sunflower, tomato, and turnips. Then we have the seeds that can go up to five years such as: Basil, beans, calendula, carrot, celery, chard, dianthus, dill, eggplant, forget-me-not, lupine, marigold, nasturtium, parsley, peas, pumpkin, sage, snapdragon, squash, sweet pea, thyme, and zinnia. The most delicate seeds lasting only a year or two are: Alyssum, aster, blanket flower, coleus, corn, cosmos, delphinium, leek, onion, pansy, parsnip, phlox, spinach, and strawflower. It's not that these seeds won't germinate after the "use by" date but you will get a considerably smaller percentage that do germinate and possibly less robust plants. To ensure success, fresher is better. Soilless seed starter is lighter and finer than regular potting soil making it easier for the little sprouts to make their way to the light. You can make your own starter mix with a combination of equal parts of peat, perlite and potting soil. A lot of seeds do well with a bit of soaking (warm water, 8-12 hours) before planting though some are so small it’s difficult to handle them wet or even damp. Soak peas, beans, squash, pumpkin, corn and other larger seeds to give them a little boost before starting indoors or planting in the garden. Keep in mind, you might have to "rough up" or scarify some seeds before starting them--they need help cracking through the seed coat in order to germinate. These are largely wild flower and perennial and flower seeds such as nasturtium, morning glories, moon flowers—ones with tough outer shells designed to pass through the digestive systems of birds and small mammals. Shaking them up in a bag with rough edged rocks will usually do the trick. Bigger, tougher seeds may need a more brutal approach—take a blade or hammer to these. You may have to put some seeds through stratification--moisture and/or cold temperature for a designated period before germinating. Seeds for false sunflower, hardy hibiscus, catmint, evening primrose perennial sweet pea, lupine, rudbeckia and many wildflowers need a period of cold and moisture before they will germinate. Plant these in your starter trays as you normally would, then put the trays out into a cold shed or garage, away from exhaust fumes, for a few weeks before starting indoors. Be sure they are covered to keep out any little rodents looking for a snack. https://www.americanmeadows.com/blog/2017/06/05/how-to-scarify-and-soak-seeds-for-spring-planting/ https://www.gardeningknowhow.com/garden-how-to/propagation/seeds/seed-stratification.htm I've learned the hard way that windows are not the best place for young seedlings. Windows can be drafty, the glass conducts cold, and nighttime temperatures can be downright chilling. Seedlings do best with consistent temperature and light. A cool, white fluorescent double-bulb hanging fixture suspended 2-3 inches above the seedling trays for 12 to 16 hours per day is ideal and not too difficult to manage. Fixtures are fairly inexpensive, especially if you can find them at a thrift store. I always start seeds too soon so have to contend with leggy seedlings well before it is time to plant outdoors. This means I must transplant them into larger pots and get them as much light and breeze as possible to toughen them up for their adventure in the garden. Unlike trees, many seedlings such as tomatoes and broccoli can be transplanted with their stems buried. So a 6 inch seedling can be transplanted to be a 3 inch seedling, the buried stem will then start rooting. Plant these up to, but no deeper, than the first little leaves (the cotyledon leaves). Of course transplanting seedling into large pots will also slow them down as they will have to concentrate on adapting to their new digs. This can be good in that spring planting time may be well off yet and you want the seedlings to develop good strong roots before they go out into the garden. Here is a handy guide to when to start your seedlings indoors (in our area April 1 is 8 weeks before last frost): 8 Weeks --cabbage, broccoli, eggplant, lettuce, peppers 6 weeks--perennial flowers, tomatoes, watermelon 3-4 weeks--cucumbers, squash, pumpkins, muskmelon Let the ground warm up before planting your little seedling, else they may go into shock and take days or weeks to recover. Even though the days may be warm, plant after danger of frost. In plant hardiness zones 3b-4b our average last frost is May 24-30. Keep in mind when choosing seeds, especially when sewing directly into the garden bed, that our growing season here in NW Wisconsin is roughly 110 days. Other resources: Common mistakes when starting seeds Seed Saving Do a Google search on “seed starting indoors,” there are lots of great YouTube videos and many, many great articles as well as. Author Pam Davies MG Volunteer MGV |
|
| North Country MGV | gARDEN bLOGS |
Location |
|
 RSS Feed