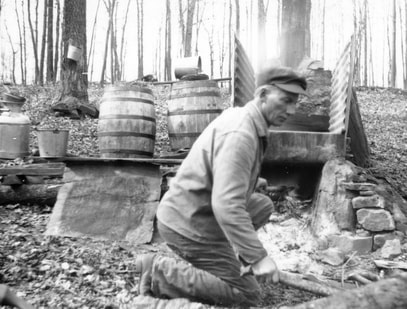
 Making maple syrup circa 1918 Making maple syrup circa 1918 ,Sequel to: Sugar Maple Sap is on the Run!! Once you have collected your buckets of sap from your sugar maple trees you will want to process it as soon as possible to avoid bacterial contamination. The processing will produce the thick rich amber color that we expect from maple syrup. Straining, boiling, and skimming constitute the processing. You will stain at the beginning and end of the processing, in the middle you will boil and skim. Strain your fresh sap through about 10 layers of cheese cloth, or a clean white cotton weave (not terry) dish towel or specially made filters, in a sieve or colander or filtering frame suspended over a clean bucket or the pot in which you will be boiling the sap. Straining gets out any debris that got into the sap during tapping. If you can't process your sap right away store it refrigerated. Unless you are doing a small batch, you will want to do the initial boiling out of doors as the steam that rises off the boiling sap will be thick and sticky. You will need a heat source (a wood fire and plenty of wood or a propane cook top), a large wide pot (aluminum, enamel or heavy iron), a large skimming spoon and a candy thermometer. Your fire should be nice and hot before you start and your pot should be securely suspended above it--on a grate suspended between cinder blocks possibly. Fill your pot about 2/3 full to begin as it will come to a boil more quickly. If you have multiple pots and a big enough fire you can cook down more sap at once. You will be feeding the fire and watching the boiling pots so plan on spending the full afternoon on this process. Add sap to your pot as it boils down but be careful not to splash the hot sap onto yourself. Add only enough sap that you keep the boil up to keep the evaporation process moving along. Foam will form on top of the boiling sap. Skim off the foam and discard periodically. Use the candy thermometer to check the temperature of the boiling sap. As the water boils out the temp will rise. The sap will be done when the temperature reaches 219 degrees (7 degrees above the water boil temp at your altitude for your thermometer). If you are working with a small enough batch you can do the final boil to temp on your stove top in the kitchen. When the boiling sap is ready it will be very foamy (do not skim this foam). At 219 degrees the syrup will still seem thinner than you want it to be but as it cools it will thicken up. Cool it down a bit before straining again. Once it is strained, bring back to 200 degrees then ladle into sterilized, preheated pint or quart jars to 1/2 inch from the top, wipe the rim, cover and tighten rims to snug. Let cool slowly out of any draft, on a towel with a few inches air space between the jars. If you get a good seal--the lid pops and dimples inward as it would when canning--you can store the jars at room temp. Otherwise, store in the refrigerator as you would an open jar of syrup. You can also process in a water bath as you would jelly or jam. If you find you really like the process of taping your trees and making your own syrup, there are many supplies that you can purchase online or at hardware stores that will make the process easier and more exact. Here are some articles on processing your sap into syrup: https://files.dnr.state.mn.us/destinations/state_parks/maplesyrup_how.pdf https://ouroneacrefarm.com/2014/03/17/make-maple-syrup-ii-boiling-filtering-canning/ There are lots of YouTube videos on processing your maple syrup. All of them have a little bit different take on how to do it. Here are a few videos (do a Google search on "how to make maple syrup YouTube" for more) : https://www.youtube.com/watch?v=OAmuFLz8Tek https://www.youtube.com/watch?v=xKA3NfQSrtk https://www.youtube.com/watch?v=jwz0ywwuk4U https://www.youtube.com/watch?v=Q_bPW6Ig8iM Article by Pam Davies MGV 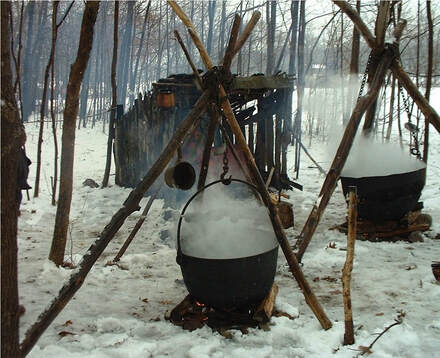
2 Comments
6/1/2022 11:52:41 am
Thank you for explaining that once the syrup cools, it gets thicker. I've been wondering more about this step once my friend mentioned wanting to make her own maple syrup. I'll have to share this with her so she knows what to expect. 8/3/2023 09:10:01 am
Just read this article and I can say these are awesome great tips on how to take care of your DNR Refrigeration. I will be using this tips for my own clients so that there DNR Refrigeration in San Antonio, TX go smoothly! Leave a Reply. |
|
| North Country MGV | gARDEN bLOGS |
 RSS Feed
Location |
|