|
Final installment of Seed Starting Indoors Part 1 Seed Starting Indoors Part 2 More on Seed Starting Indoors 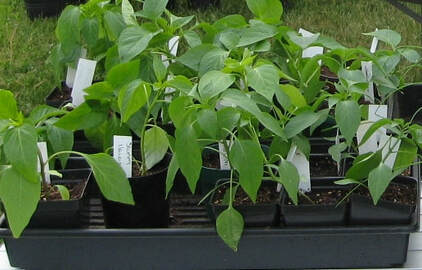 Pepper seedlings ready to plant. Photo by Pam Davies The biggest mistake I make with my seedling is giving them too much sun and wind when I bring them outdoors for the first time. The poor little guys get their leave singed and some get blown over and have to be staked up. After spending so many weeks tending these seedlings, you would think I'd be a little more careful. But it is easy to get busy cleaning out beds and getting ready for planting. The sun moves and what was dappled shade becomes direct sun in a short time. The sun in late May is very powerful and can burn the tender leaves of even the hardiest plants when they haven't been "hardened off" yet. Hardening off is the process of acclimating the seedlings to the outdoors before planting them in the garden. (You will want to harden off store bought seedlings that have been sheltered in a greenhouse as well). This will take at least ten days to two weeks. Begin hardening in a sheltered spot in shade then dappled sun for a few hours the first few days, increasing exposure until the plants are reveling in their new environment. Do not fertilize during hardening off. The plants will be under stress adapting to these new conditions. Do water them before they wilt. They will dry out quickly in the sun and breeze. After the first 4 or 5 days of hardening during which I bring the seedlings indoors at night, I have a couple of wagons that I put my flats into and pull them into the garage at night where they will get accustomed to the cooler night temps as the garage is detached and not heated. Toward the end of the hardening off period you will be leaving the plants outdoors fully exposed through the night unless nighttime temps get into the 30s or low 40s especially for tomatoes and peppers. https://extension.umn.edu/planting-and-growing-guides/starting-seeds-indoors#hardening-off-seedlings-1179860 Before planting in the garden, be sure that soil temps are warm enough to encourage root growth and avoid putting your seedling into shock. The warmer the better is a good rule of thumb. Hardy plants such as broccoli, Brussels sprouts, kohlrabi, cabbage, onions, leeks and parsley can take ground temps as cold as 40 degrees but if they have been started indoors and are not used to those temps you might want to wait until the ground warms a bit more. You can sow these seeds directly into the ground at these soil temps. Half-hardy plants such as celery, Chinese cabbage, lettuce, and endive can take soil temps down to 45 degrees. Tender plants will need soil temps of at least 50 to 65 degrees. Basil, tomatoes and peppers, need the warmer soil temps. Squash, pumpkins, and sweet corn can take the cooler while Cucumber and muskmelon like the middle range. One rule of thumb uses the science of phenology as the test of when to plant. Phenology looks at what is happening with other species and times the planting season by how other species are developing. For instance, when lilacs are in full bloom plant your veggies is an over generalized rule of thumb; phenology can get much more specific. Here is a link to a UW-Madison Extension article on phenology. https://hort.extension.wisc.edu/articles/phenology/ Some people like to plant by moon phases once the threat of frost has passed. Check out this Mother Earth News guide to planting by moon phases https://www.motherearthnews.com/organic-gardening/living-homegrown-how-to-schedule-your-planting-by-the-moon Your beds should be fully warmed and the soil turned to a depth of at least 8 - 12 inches depending on what you are growing. Working the soil when it is too moist will create clumps that will harden and be inhospitable to your seedlings. Wait until the soil is dry enough that it will break apart when turning it. Turning with a shovel can be better than using a tiller as a tiller can create "hard pan" below the blades that will discourage root penetration and good drainage. If you have a large garden, however, a tiller may be the only way to go. Till every other year or so to avoid hard pan build up. Take care to walk only in paths to keep your tilled soil from becoming compacted by trodding on it. Amend the soil as needed before planting. Add some peat or Perlite to loosen up compact silty soil. If you have a lot a clay in the soil you might want to add some sand as well. A good friable soil will contain silt, sand and clay as each contributes to the proper texture of the soil for root growth and drainage, and the ability of the soil to hold moisture and nutrients. Adding organic matter to this mix (peat or decomposed leaves, wood chips, bark or straw) provides nutrients and a medium for beneficial bugs and bacteria to thrive. Add fully composted manure (100%) to your soil if you think it is depleted. (Watch for a soil testing article on this site). Mix your amendments into the soil well and let it sit for a few days or longer before planting. This lets the soil settle out to a more uniform texture and temperature and allows microbials to get going. Once your plants are in the ground, water them then use the same week fertilizer solution (quarter strength) that you used on your seedlings. This will give the seedlings a little boost to get started and help them not go into shock in their new environment. After that, water as needed but sparingly to get the seedlings used to dealing with a less regular watering schedule but don't let the seedlings wilt. You will want to think about mulching to keep moisture in and weeds down. Laying down newspaper (2 or 3 pages thick--no color ink) around the plants then covering this with chips, grass clippings, straw, or leaves is a tried and true method. The paper and mulch will decompose over time and can be dug under in the fall or raked aside, dried and covered, and used for mulch in the spring. A couple of notes on mulch. Straw, hay, grass clipping and leaves can bring with them weed seeds. You can sprinkle a pre emergent such as Preen or corn gluten meal over the mulch to keep weeds from germinating in the mulch. Also, be aware, if you are having a particularly wet spring or summer you may want to push the mulch away from the plants so the soil has a chance to dry out. A good drying out cycle between rains or watering helps to keep down fungal growth. Plant spacing and exposure to wind also helps to keep fungus at bay. Mulching https://www.veggiegardener.com/best-mulches-to-use-in-the-vegetable-garden/ A few notes on starting seeds in the garden, do not mulch until plants are at least a few inches tall. Be careful not to get pre emergent on beds that will be seeded as this will prevent germination. Seeded beds must be kept moist so will need to be monitored at least twice a day. You can cover the seeded beds with a plastic tent to keep moisture in while seeds are sprouting. Good luck with your seedling, have a great growing season and watch for more articles here! 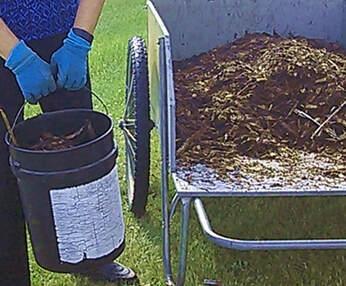 Wood chip mulch. Photo by Pam Davies
0 Comments
Leave a Reply. |
|
| North Country MGV | gARDEN bLOGS |
 RSS Feed
Location |
|